YouAndMeNet
Conditional Diffusion Model for Art Object Generation
DIFFUSION v2 ACTIVEThe Core Idea
Diffusion models learn to reverse a gradual noising process. Instead of learning to generate images directly (like GANs), they learn to denoise images step by step.
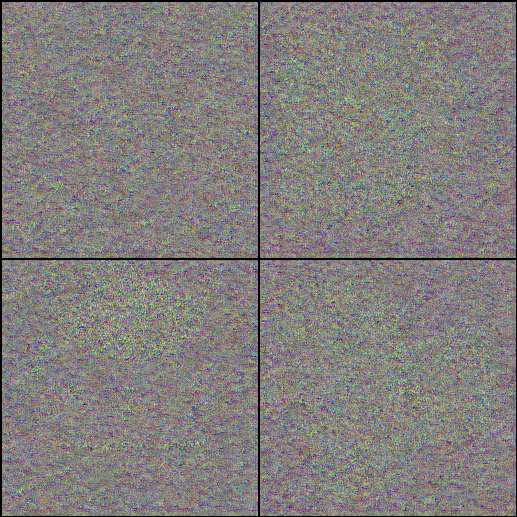
Forward Process (Adding Noise)
We gradually add Gaussian noise to an image over T timesteps until it becomes pure noise:
At each step: xt = √αt · x0 + √(1-αt) · ε
where ε ~ N(0, I) is random Gaussian noise
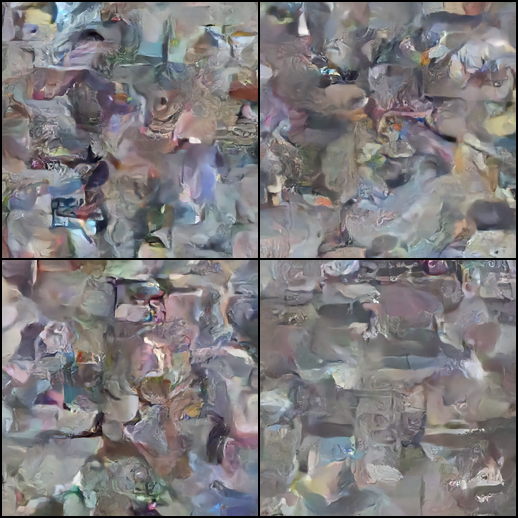
Reverse Process (Denoising)
The neural network learns to predict the noise that was added, allowing us to reverse the process:
Model predicts: εθ(xt, t, c) ≈ noise added at step t
Given condition c (our 32 features)
Why This Works
- Simpler learning: Predicting noise is easier than predicting entire images
- Stable training: Simple MSE loss, no adversarial min-max game
- High quality: Many small denoising steps = fine-grained control
- Conditional generation: Just inject condition into each denoising step
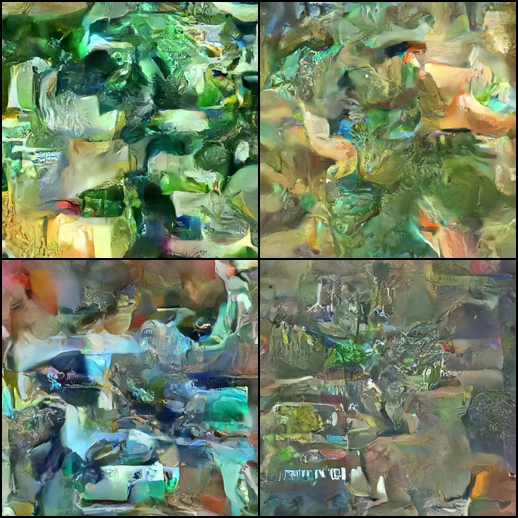
What it does:
- Takes 32 feature values describing color, lighting, material, shape, topology
- Generates 256×256 images that match those features
- Trained ONLY on my own photos (~3000 images from camera roll, glasswork)
- No pretrained weights - trained from scratch
- No external data - only my photographs
1. ResBlock - The Building Block
Every level of the U-Net uses ResBlocks. They process features while injecting time+condition information:
2. Sinusoidal Time Embedding FROM PAPER
We encode the timestep t (0-999) into a 64-dimensional vector using sine/cosine functions at different frequencies:
Why this works: Different timesteps need different information. Early steps (t≈0) need fine details, late steps (t≈999) need global structure. The varying frequencies encode both.
3. Self-Attention MY CODE
Applied at 32×32 and 16×16 resolutions. Lets the model look at all spatial positions when generating each pixel:
4. DDIM Sampling MY IMPLEMENTATION
DDIM (Denoising Diffusion Implicit Models) allows fast sampling in 50 steps instead of 1000:
The Problem with Semantic Descriptions
Most modern image AI uses text prompts: "a photo of a blue glass vase in soft lighting". But text descriptions are:
- Subjective - "soft lighting" means different things to different people
- Incomplete - you can't describe every visual detail in words
- Lossy - information is lost when converting visuals to language
- Biased - trained on internet captions with their cultural assumptions
My Approach: Numerical Image Tokens
I got the idea by trying to reverse-engineer images: what if instead of describing an image with words, I could describe it with numbers that capture visual properties directly?
"blue vase" → CLIP encoder → [0.2, -0.1, 0.8, ...] (768-dim semantic embedding)
My Non-Semantic Conditioning:
Image → Feature extractors → [hue=0.6, sat=0.7, circularity=0.4, ...] (32-dim visual properties)
This is like building a token vocabulary for images - but instead of discrete word tokens, I use continuous visual measurements. Each feature is:
- Objective - computed directly from pixels, not interpreted
- Complete - captures aspects words can't express
- Invertible - the same features can reconstruct the same visual style
- Language-independent - works without any text training data
Why 32 Features?
I experimented with different feature counts (16, 32, 64, 128). 32 features provide a good balance:
- Enough dimensions to capture distinct visual properties
- Small enough that the model can learn their meaning
- Each feature is interpretable and controllable
Think of it as a 32-dimensional visual space where each axis represents a measurable property.
Each image in the dataset has 32 features extracted. During generation, you specify these features to control the output:
COLOR (8)
- dominant_hue - Main color (0-1, maps to 0-360°)
- dominant_sat - Saturation of main color
- dominant_val - Brightness of main color
- color_variety - How many distinct colors
- temperature - Warm (red/yellow) vs cool (blue)
- sat_variation - Saturation range
- color_contrast - Difference between colors
- high_sat_ratio - % of vivid colors
LIGHTING (6)
- specular_highlights - Shiny spots
- shadow_intensity - How dark shadows are
- shadow_ratio - % of image in shadow
- brightness_var - Light variation
- local_contrast - Edge sharpness
- obj_bg_contrast - Object vs background
MATERIAL (5)
- reflectivity - Mirror-like quality
- transparency - See-through quality
- roughness - Texture graininess
- metallic - Metal-like appearance
- color_uniformity - Solid vs varied
SHAPE (7)
- circularity - How round (0-1)
- solidity - Filled vs hollow
- spectral_entropy - Frequency complexity
- graph_density - Edge connectivity
- mean_curvature - Average bendiness
- curv_variance - Curvature variation
- affine_curvature - Scale-invariant curve
TOPOLOGY (6)
- euler_char - V - E + F formula
- genus - Number of "handles"
- num_holes - Holes in object
- complexity - Overall intricacy
- spectral_gap - Graph eigenvalue gap
- betti_1 - 1D topology number
Background
This project was developed over several months while studying programming at vocational school (1.5 years). The code was written in dialogue with AI assistance (Claude) - I would write code, discuss problems, understand solutions, and then implement them in my own way.
What I Created
- The core concept: Using non-semantic numerical features instead of text prompts - my own idea from trying to "reverse-engineer" how to describe images without words
- Architecture decisions: Channel progression (64→128→256→512→512), attention placement at 32×32 and 16×16, number of ResBlocks per level
- The 32 feature system: Selecting which visual properties matter (color temperature, topology, curvature, etc.) and how to normalize them
- Project structure: Organizing files, naming conventions, splitting code into modules
- All experiments: 18 failed GAN versions before switching to diffusion, each with different approaches
- Dataset: ~7000+ of my own photographs, manually curated
Examples of Code I Wrote
| What | Example of my decisions |
|---|---|
| Training parameters | Choosing batch_size=4, lr=1e-4, 1000 timesteps, cosine schedule |
| Model config | base_channels=64, channel_mult=[1,2,4,8,8], num_res_blocks=2 |
| Feature selection | Deciding to use Euler characteristic and Betti numbers for topology |
| File organization | Splitting into diffusion_model.py, train_diffusion.py, build_features.py |
| Logging & checkpoints | Saving samples every N epochs, tensorboard integration |
| Data augmentation | Choosing which transforms to apply (flips, color jitter, etc.) |
| Debugging | Finding why training diverged, fixing NaN losses, memory optimization |
What AI Helped With
I used both ChatGPT and Claude Code throughout the project. They brought different perspectives and strengths, which helped me understand problems from multiple angles.
| Area | Type of help |
|---|---|
| Monotonous calculations | Writing repetitive code patterns, boilerplate, tensor reshaping operations |
| Math implementation | Translating paper equations into PyTorch (alpha schedules, noise sampling, loss functions) |
| Concrete examples | Showing how a concept looks in actual code, not just theory |
| Implementing principles | Turning design ideas ("I want attention here") into working code |
| Finding links & references | Locating relevant papers, documentation, and tutorials |
| Debugging | Explaining error messages, finding tensor shape mismatches, memory issues |
| Library usage | Correct syntax for OpenCV, scikit-image, PyTorch, torchvision functions |
| Concepts | Explaining attention mechanisms, normalization techniques, loss landscapes |
| Code structure | Suggesting how to organize classes, split files, write docstrings |
| Different perspectives | ChatGPT and Claude often suggested different approaches - comparing them helped me learn |
Libraries Used
- PyTorch - Neural network framework
- torchvision - Image transforms and utilities
- OpenCV - Computer vision operations
- scikit-image - Image processing algorithms
- NumPy - Numerical computing
- tqdm - Progress bars
- TensorBoard - Training visualization
Papers Referenced
- DDPM - Ho, Jain, Abbeel: "Denoising Diffusion Probabilistic Models" (NeurIPS 2020)
- DDIM - Song, Meng, Ermon: "Denoising Diffusion Implicit Models" (ICLR 2021)
- Improved DDPM - Nichol, Dhariwal: "Improved Denoising Diffusion Probabilistic Models" (2021)
- U-Net - Ronneberger et al.: "U-Net: Convolutional Networks for Biomedical Image Segmentation" (2015)
- Attention - Vaswani et al.: "Attention Is All You Need" (NeurIPS 2017)
- Group Norm - Wu, He: "Group Normalization" (ECCV 2018)
This project was developed in dialogue with AI, combining my 1.5 years of programming studies with AI assistance for implementation details. The ideas, design decisions, experiments, and dataset are my own work. No pretrained weights were used - the model was trained from scratch on ~7000 of my own photos.